
Few desserts evoke the nostalgia and charm of traditional baking quite like an old-fashioned coconut cake. With its moist layers, rich Frosting, and delicate coconut flavor, this classic Southern dessert is a showstopper at any gathering.
Whether you’re baking for a holiday or birthday or to help you indulge your sweet taste, this guide will help you make the perfect old-fashioned coconut cake right in your own kitchen.

Why Old Fashioned Coconut Cake is a Timeless Classic
Many hold a special place in their hearts for old-fashioned coconut cake. This dessert is steeped in tradition, often made from recipes handed down through generations. Its charm lies in its simplicity and use of fresh, natural ingredients. The delicate flavor of coconut combined with a buttery cake base and creamy Frosting makes it irresistible.
Ingredients You’ll Need
Before starting the recipe, gather the following ingredients to ensure you have everything you need to bake the perfect old-fashioned coconut cake.
For the Cake:
- 2 ¾ cups all-purpose flour
- 2 ½ teaspoons baking powder
- ½ teaspoon salt
- 1 cup unsalted Butter, softened
- 2 cups granulated sugar
- 4 large eggs, room temperature
- 1 teaspoon vanilla extract
- 1 teaspoon coconut extract
- 1 cup full-fat coconut milk
For the Frosting:
- 1 cup unsalted Butter, softened
- 4 cups powdered sugar, sifted
- 1 teaspoon vanilla extract
- 1 teaspoon coconut extract
- 4–5 tablespoons heavy cream
- 2 cups sweetened shredded coconut (for garnish)
Step-by-Step Instructions
Follow these detailed steps to craft your old-fashioned coconut cake:
Step 1: Preheat and Prepare
Set the oven to 175°C (350°F). Flour and grease 8-inch round cake pans or line them with parchment paper for easier removal.
Step 2: Mix the Dry Ingredients
Whisk together the flour, baking powder, and salt in a larger basin. This ensures the cake layers are light and fluffy, a hallmark of any good old-fashioned coconut cake.
Step 3: Cream the Butter and Sugar
Using a stand or hand mixer, cream at medium speed until the sugar and softened Butter is light and fluffy. This process takes about 3–5 minutes and creates the cake’s soft texture.
Step 4: Add the Eggs and Extracts
Mix the eggs with the butter-sugar mixture one at a time, beating well after each addition. Then, add the vanilla and coconut extracts to infuse the batter with that signature old-fashioned coconut cake flavor.
Step 5: Incorporate the Dry and Wet Ingredients
Gradually mix the dry ingredients with the batter, alternating with the coconut milk. Start and end with the dry ingredients, mixing just until everything is together. Take care not to combine too much since this can make the cake dense.
Step 6: Bake the Layer
Evenly distribute the batter among the prepared cake pans. Use a spatula to smooth the tops, then bake in the oven for 25–30 minutes. A toothpick inserted in the center should come clean after a few minutes.
Step 7: Cool the Cakes
Leave the cakes in their pans to cool for ten minutes, then move them to a wire rack to finish cooling. This step is crucial for a perfectly structured old-fashioned coconut cake.
Prepare the Frosting.
Step 1: Cream the Butter
Use a large mixing bowl to beat the softened butter basin until it becomes smooth and smooth.
Step 2: Add the Sugar and Flavorings
Gradually add the powdered sugar, mixing at a low speed, one cup at a time, to avoid a mess. Add the vanilla and coconut extracts and one tablespoon of the heavy unit. The Frosting is spreadable, and one layer of cream is needed at a time.
Step 3: Toast the Coconut (Optional)
For added texture and flavor, toast one cup of the shredded coconut in a dry skillet over medium heat until golden brown. Let it cool completely before using it as a garnish.
Assembling the Old Fashioned Coconut Cake
Now that your cake layers and Frosting are ready, it’s time to assemble your old-fashioned coconut cake.
Step 1: Level the Layers
If necessary, use a serrated knife to level the tops of the cake layers, guaranteeing a stable and even cake.
Step 2: Stack and Frost
Place the first cake layer on a serving plate or cake stand. Spread an even layer of Frosting over the top, then add the second layer. Repeat the process until all layers are stacked. Apply a little crumb to the cake frosting, then refrigerate for 20 minutes.
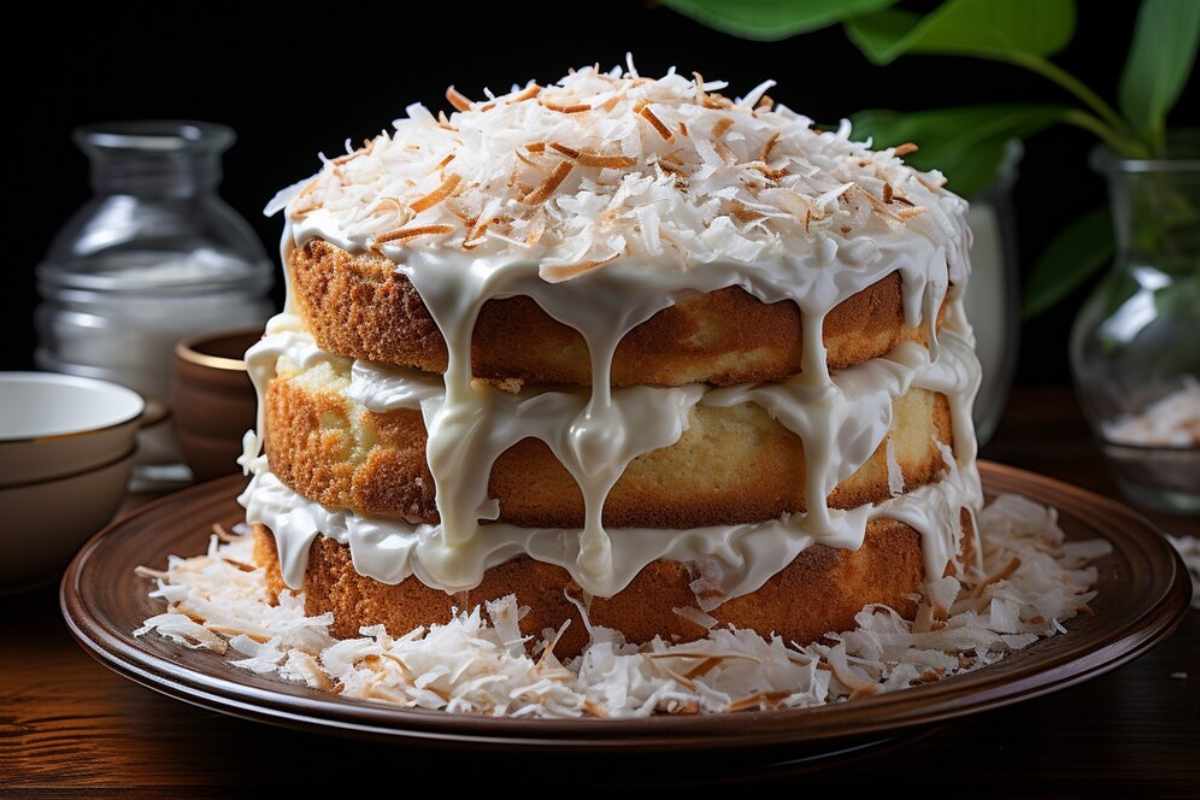
Step 3: Add the Final Frosting and Coconut
After solidifying the crumb layer, apply a thick layer of Frosting over the cake. Shredded coconut should be pressed onto the top and sides. O of cake, ensuring it’s fully covered. Sprinkle toasted c coconut top for a decorative touch.
Tips for Perfecting Your Old Fashioned Coconut Cake
- Fresh Ingredients: Fresh coconut milk and high-quality butter butter will improve your cake’s taste and consistency.
- Room Temperature Ingredients: Allow your Butter, eggs, and milk to come to room temperature for smoother mixing and better baking results.
- Don’t Skip the Coconut Extract: This ingredient is essential for achieving the authentic flavor of an old-fashioned coconut cake.
- Refrigeration: For the best flavor, refrigerate the cake for a few hours before serving. This allows the flavors to meld beautifully.
Why This Recipe Stands Out
What sets this old-fashioned coconut cake recipe apart is its balance of tradition and simplicity. The moist cake layers, rich Frosting, and coconut garnish combine to create a dessert that is both timeless and irresistible. This cake will undoubtedly impress whether you’re making it for a family gathering or a special occasion.
Conclusion
Creating an old-fashioned coconut cake at home is a rewarding experience that connects you to the rich traditions of baking. This cake is a true crowd-pleaser with its perfect blend of moist layers, creamy Frosting, and sweet coconut.
By following these steps and tips, you’ll have a stunning dessert that is as delicious as beautiful. So, gather your ingredients, roll up your sleeves, and bring the timeless charm of an old-fashioned coconut cake to your table!
Frequently Asked Questions(FAQs):
What makes an old-fashioned coconut cake unique?
An old-fashioned coconut cake is known for its moist, buttery layers, rich coconut flavor, and sweet shredded coconut garnish, making it a timeless dessert.
Can I use fresh coconut instead of shredded coconut?
Yes, freshly grated coconut can be used for a more authentic taste. For added flavor, be sure to use it for both the frosting and garnish.
How do I store an old-fashioned coconut cake?
Store the cake in an airtight container in the refrigerator for up to 5 days. Allow it to come to room temperature before serving.
Is it possible to prepare this cake in advance?
Yes, you can bake the layers a day ahead of time and keep them in plastic wrap. On the day you want to serve the cake, put it together and frost it.
Can I make it gluten-free?
Absolutely! Substitute all-purpose flour with a 1:1 gluten-free baking flour blend for a gluten-free cake version.


